
A Humminbird fish finder is an invaluable tool for anglers looking to enhance their fishing experience and increase their chances of success on the water. With advanced features and cutting-edge technology, Humminbird PiranhaMax 197c can provide detailed information about the underwater environment, including the presence of fish and the structure of the lake or riverbed. However, in order for you to fully harness the power of this device, it is essential to optimize its settings. In this article, we will explore the best settings for a Humminbird fish finder to help you maximize its effectiveness.
1) Adjust the Sensitivity:
 One of the key settings to optimize your Humminbird fish finder is the sensitivity level. The sensitivity determines the device’s ability to detect and display underwater objects and fish. Setting the sensitivity too high can result in a cluttered display, making it difficult to distinguish between fish and other objects. On the other hand, setting the sensitivity too low may cause you to miss out on important details. Start by setting the sensitivity at a moderate level and make adjustments based on the water conditions and your specific fishing needs.
2) Fine-tune the Depth Range:
The depth range setting allows you to focus on a specific depth range of the water column. By narrowing down the depth range, you can concentrate on the areas where you believe the fish are most likely to be. Experiment with different depth ranges based on the structure of the waterbody and your target species. For example, if you are targeting bass near a submerged structure, you may want to set a narrow depth range around that structure to increase your chances of finding fish.
3) Utilize the Zoom Function:
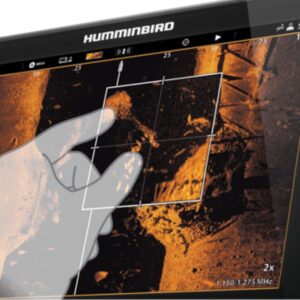 The zoom function is a useful feature on Humminbird fish finders that allows you to magnify a specific portion of the sonar display. This can be especially helpful when trying to identify smaller fish or when fishing in areas with a lot of underwater clutter. Use the zoom function to focus on the bottom of the water column or a specific area of interest. By zooming in, you can gain a clearer picture of what’s happening beneath the surface and make more informed decisions.
4) Experiment with Frequency Settings:
Humminbird fish finders offer different frequency options, such as 200 kHz and 455 kHz. Lower frequencies, like 50 kHz, provide a wider coverage area but with less detail, making them suitable for deeper waters. Higher frequencies, such as 200 kHz or 455 kHz, offer greater detail but with a narrower coverage area, making them ideal for shallow or medium-depth waters. Experiment with different frequency settings to find the one that works best for your fishing environment and target species.
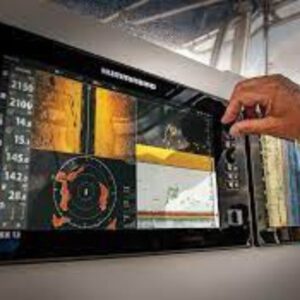
5) Use GPS and Mapping Features:
Many Humminbird fish finders come equipped with GPS and mapping capabilities. Take advantage of these features to mark waypoints, create custom maps, and save your favorite fishing spots. By utilizing GPS and mapping, you can return to productive locations, track your routes, and analyze your fishing patterns over time. This information can be invaluable for planning future trips and increasing your overall fishing success.
In conclusion, optimizing the settings on your Humminbird fish finder is essential for maximizing its performance on the water. Adjust the sensitivity, fine-tune the depth range, utilize the zoom function, experiment with frequency settings, and take advantage of GPS and mapping features. Remember that optimal settings may vary depending on the fishing conditions and your target species, so don’t hesitate to experiment and make adjustments accordingly. With the right settings dialed in, your Humminbird fish finder can become your ultimate fishing companion, helping you locate fish and improve your angling skills.


